When we search for documentation and articles related to the customer portal, we usually find information that helps agents and administrators to customize and use it, but there are no tutorials about how a Customer can use the Portal.So, if you want to learn more about the features and how to use the customer portal as a customer, you’re in the right place.
1. Invitation and first login
Once your administrator adds you to the project, you will receive a notification to finish setting up your account and the link will redirect you to a page to set your Full name and Password.

Once you click on Weiter, you are logged in and see the available request types of the project you were invited to.
2. Access the main page and projects
When you are invited to a project, the first login redirects you to a page like this:

3. Customize profile
On the top right, you can find your Profile icon and by clicking on this icon you see the option Profile and Log out. Click on Profile to edit your information.

4. Create tickets
To create tickets, select the request type. Once you select a request type, it shows the form for you to fill out and send to the support team.

After sending the request, you are automatically redirected to the ticket:

5. Work with tickets
Add a comment:
The editor below has some options for you to edit your text and others like add links, images, code blocks, and tables.

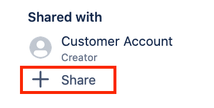
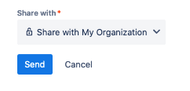
Share a ticket:
If your administrator allows, you can share the ticket with other customers or organizations.
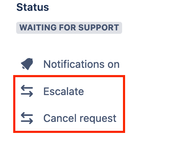
Change status:
Depending on the project type, you will be able to change the status of the ticket.
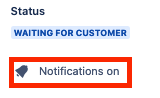
Enable and disable notifications:
If you were added as a participant of a ticket or even as a reporter and you don’t want to receive future notifications, you can disable it.
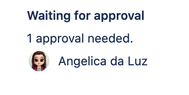
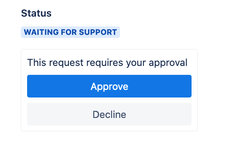
Check approvals:
Usually, the status is Waiting for Approval and on the ticket, you can see who are the people that need to approve your request.
6. Using the knowledgebase
Some administrators link Service Management to Confluence to provide articles that may help you to resolve the issue on your own.
There are four ways to find articles in the customer portal.
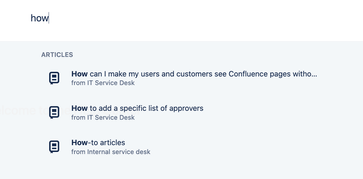
On the main page, by using the search box:
When you start typing, it will load three articles related to what you are searching for.
By clicking on the magnifying glass on the top right:
This icon appears when you are not on the main page.

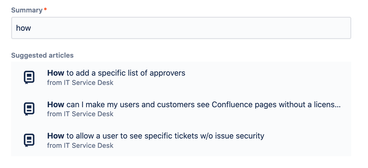
While creating a ticket:
When you type something on the Summary field, it will show three articles related to the text you just added.
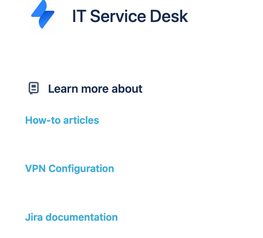
Category:
The last option is what we call Category that is a group of articles that the administrator organizes to show when you click on the project to create the ticket, so instead of showing the Request types as mentioned on the How to create tickets section, it will show the categories and if none of the articles helps, then you can just go ahead and create the ticket.
List of categories:
By clicking on a category, you will see the list of articles and to view the entire documentation, just click on the desired one.

If none of the articles help, then click on Need to raise a request? Contact us. which will redirect you to the Request types page.
7. Finding tickets
There are four categories that we can split the requests in the customer portal.
Tickets where you are the reporter.
Tickets where you are the approver.
Tickets shared with your organization.
Tickets where you are a participant.
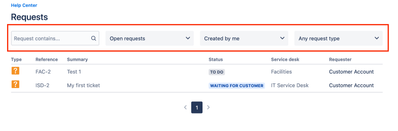
On the top right, click on Requests.
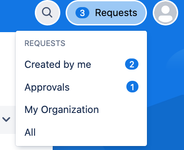
Tickets you created:
Click on Created by me. The default filter will show tickets that are still open and then you can filter to show the closed ones or filter by specific request type.
Tickets waiting for your approval:
Click on Created by me. The default filter will show tickets that are still open and then you can filter to show the closed ones or filter by specific request type.
Tickets shared with your organization:
If your administrator added you to an organization, it will show on the Requests the name of the Organization and if some ticket is shared with this org, it will show there.
Note: When you are part of an organization you can share the request with them while creating a ticket. The option will be visible as the last field of the form, near to the Send button.
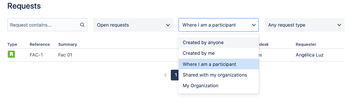
Tickets where you are a participant:
If your teammate shared the ticket with you, click on Requests > Created by me or Requests > All and filter the tickets where you are the participant.
8. Manage the columns on your requests' list
With the recent updates of Service Management, is now possible to change the order of the columns on the requests page.
Click on Requests and select the preferred option.
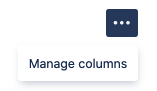
On the right side on the top, you will see the icon , so click on it and select “Manage columns”.

Once you do that, you will be able to drag and drop the fields to organize and also remove those ones which it's not necessary for you:
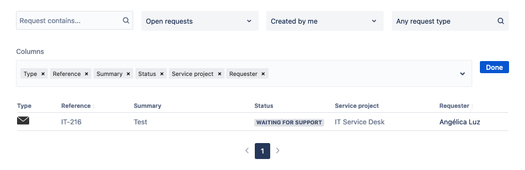
There are other fields available, such as Created date, Updated date, Due date, Assignee, and Priority but only the administrator can add those fields.
9. Features not available in the portal
Edit issue.
Delete images and comments.
Delete issues.
Advanced searches using JQL.
Online chat.
Ability to view the email addresses of the assignee and participants.
Hope this article helps you to understand how the Customer Portal works.